Why It Matters: The Impact of Small Space on Light Performance
In today’s shrinking electronic devices, from wearables to medical instruments and industrial control panels, every millimeter counts. Integrating LED indicators and illumination in these small spaces is a unique challenge. When space is limited, engineers have to direct light from an LED to a display surface without compromising brightness, color, or uniformity. Poor light pipe integration in small spaces can result in reduced light output, uneven illumination, color shifts, hot spots, or dead spots, which negatively impact user experience and product functionality. This guide will show you how to overcome these challenges and achieve excellent light performance in your small-form-factor designs.
Common Problems: Misalignment, Color Washout, and Light Bleed
Navigating the complexities of light pipe integration in small spaces often leads to several common problems that can kill an otherwise good optical design:
● Misalignment: Even a slight misalignment between the LED light source and the light pipe entrance or between the light pipe exit and the display surface can reduce light transmission efficiency. This is exacerbated in small devices where tolerances for positioning and curvature are tighter.
● Light Loss: Bends, twists, and too sharp angles in the light pipe, especially over short lengths, can cause light to escape through scattering or failure of total internal reflection, reducing overall performance.
● Color Washout/Shift: If the light pipe material or design is inefficient, the transmitted light can lose its vibrancy or shift in wavelength, making, for example, a green appear faded or bluish, which impacts indication quality.
● Light Bleed: Unwanted light escaping from the sides of the light pipe or around the display opening can create glare, reduce contrast, or illuminate adjacent components unintentionally. This is particularly problematic in devices that require precise illumination or visual separation between indicators.
● Hot Spots/Uneven Illumination: Instead of a uniform glow, the display might show bright spots where the light source is concentrated and dimmer areas elsewhere, which is a poor aesthetic and can misinterpret the indicator’s status. Optimizing the light pipe shape and incorporating optical elements, such as diffusers, can mitigate this issue. Take these factors into account in your design, considering pipe diameter, surface finish, and material refractive index to achieve the best balance of safety, cost, and optical performance in small electronic devices.
Design Best Practices
Optimal light performance in small devices requires a systematic design approach.
Choose the Correct LED Viewing Angle
The journey of light begins at the source. Choose the right LED:
● LED Type: Surface-mount device (SMD) LEDs are compact and low-profile, making them ideal for small spaces.
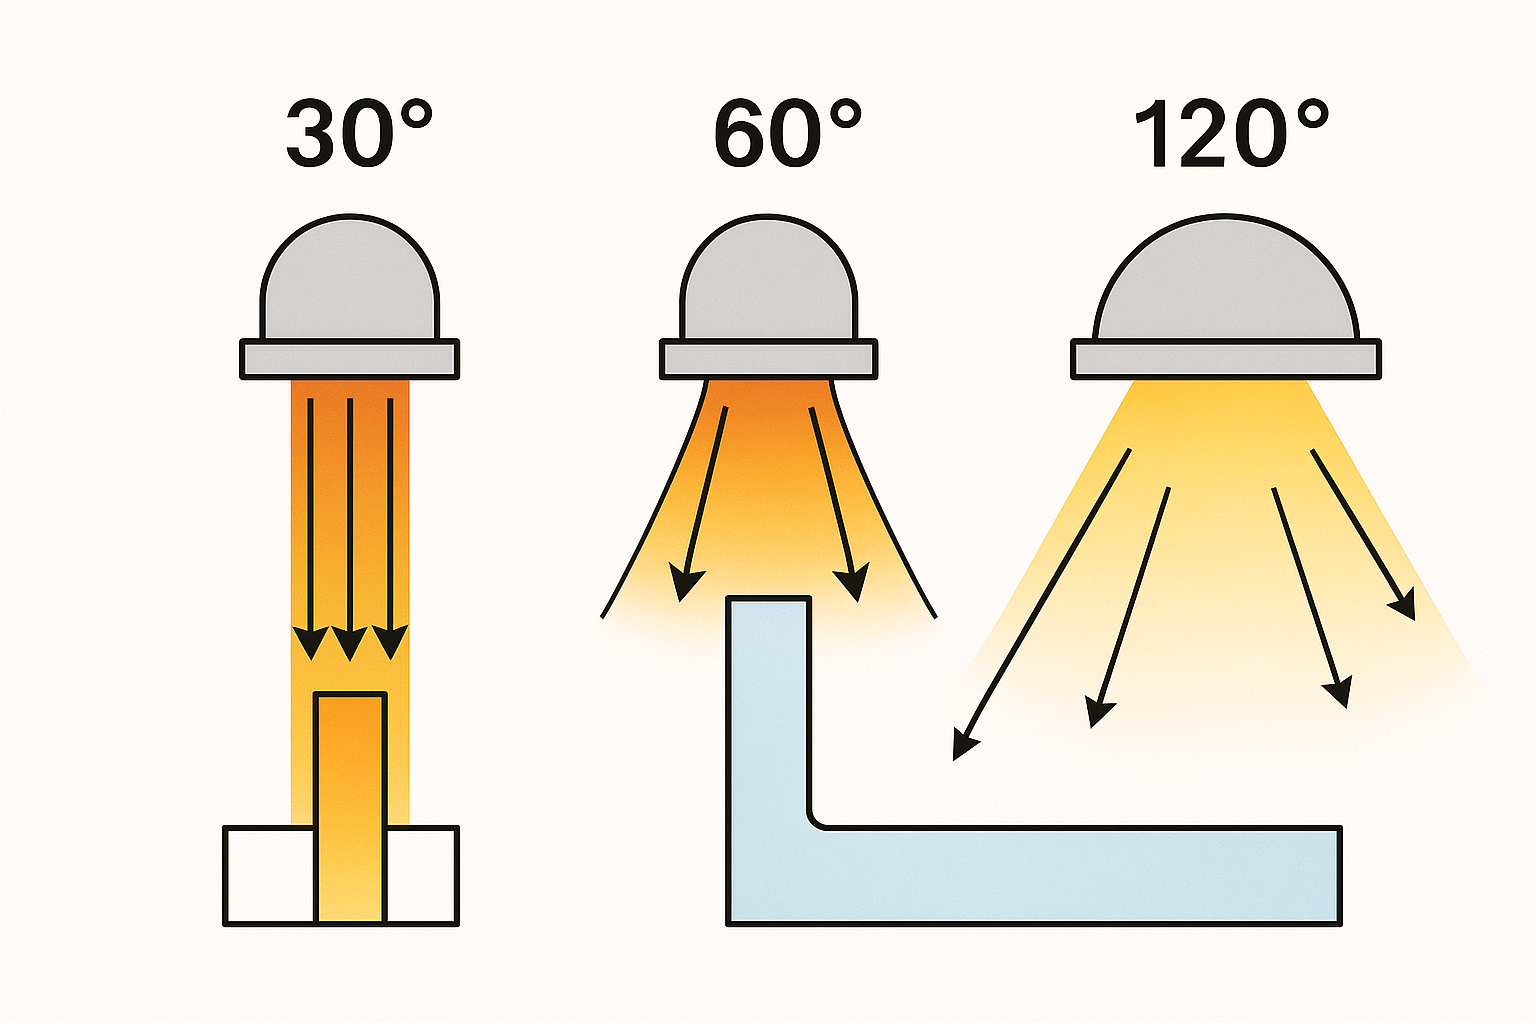
● Viewing Angle (Radiation Pattern): LEDs have different viewing angles. For light pipe applications, an LED with a narrower viewing angle (e.g., 30-60 degrees) is often more efficient as it directs more light into the light pipe entrance and minimizes initial light loss. But this must be balanced with the light pipe’s ability to capture and transmit that concentrated light.
● Brightness (MCD): Select an LED with a sufficient millicandela (mcd) output to achieve the desired brightness at the light pipe exit, taking into account inherent light losses during transmission.

Select Optimal Pipe Material and Shape
The light pipe is the conduit, and its properties are critical:
● Material:
- Polycarbonate (PC): Good clarity, impact resistance, and high refractive index (RI ~1.58), making it a popular choice for efficient light transmission. It’s also
suitable for complex shapes.
-Acrylic (PMMA): Excellent optical clarity and slightly higher refractive index (RI ~1.49) than PC, making it very efficient for light guiding. It’s rigid and can be
precisely molded.
● Shape and Geometry:
-Internal Surface Finish: The smoother the internal surface, the more efficient the total internal reflection (TIR) and light transmission will be. Imperfections cause
scattering and light loss.
-Bends and Turns: Minimize sharp bends or multiple turns. Gentle curves are always preferred to maintain TIR. If bends are unavoidable, ensure the bend radius is
generous enough to prevent light from “leaking out.”
-Entry/Exit Design: The entrance aperture should be precisely matched to the LED’s emission area. The exit geometry should be optimized for the desired
illumination pattern (e.g., diffuse, focused, uniform). Ribs and Features: Add optical features like diffusers, prisms, or Fresnel lenses at the exit to spread or focus
the light and eliminate hot spots.
Housing and Mounting
The surrounding mechanical design plays a significant role in light pipe performance:
● Alignment: Design precise mating features (e.g., pins, recesses, clips) in the housing to ensure perfect alignment between the LED, the light pipe, and the display surface.
● Light Sealing: Use opaque materials for the housing surrounding the light pipe and LED to prevent light bleed. Consider incorporating light-blocking features, such as ribs or labyrinths, to avoid unintended illumination of adjacent components or internal reflections.
● Mounting Method: Securely mount both the LED and the light pipe to prevent movement due to vibration or shock, which could cause misalignment over time. Snap-fit features, heat staking, or even light-blocking adhesives can be used.

Real-World Tips for Prototyping, Tolerances, and Testing
Turning design principles into a working product requires practical steps:
● Prototyping and Iteration: Start with rapid prototyping (e.g., 3D printing with clear resins) to test the optical path early in the design cycle. This allows for quick adjustments to geometry before committing to expensive tooling.
● Tolerance Analysis: Perform a detailed tolerance analysis on the LED placement, light pipe dimensions, and housing features. Understand how manufacturing variations might impact alignment and light performance, and design with manufacturing tolerances in mind.
● Environmental Testing: Test the light pipe's performance under various operating conditions (temperature, humidity, and vibration) to ensure reliability and consistent illumination throughout the product’s life.
●Visual Inspection and Measurement: Beyond visual checks, use light meters, spectroradiometers, and imaging colorimeters to quantify brightness, uniformity, and color accuracy at the light pipe’s output.
VCC Solutions: Custom Light Pipe Services for Compact or Complex Designs
Designing light pipe solutions for compact or complex devices can be a tough challenge, often requiring specialized expertise in optics and mechanical integration. VCC offers custom light pipe services to turn your design challenges into solutions. We provide:
●Optical Design Expertise: Our engineers use advanced optical simulation software to optimize light pipe geometry for maximum light transmission and uniform illumination in your small spaces. Material Selection: We help you choose the right light pipe materials (e.g., specific grades of polycarbonate or acrylic) for your optical, mechanical, and environmental needs.
● Prototyping and Tooling: We manage the entire process, from rapid prototyping to production tooling, to ensure precision and quality.
● Complete Solutions: We offer LED and light pipe assemblies that are pre-aligned and pre-tested, allowing for seamless integration and reduced assembly time and risk.


